
This topic discusses: |
Links to related topics: |
| Search Online Doc | |
| Current Release Notes | |
Once a requisition has been approved, it can be released for picking. Releasing a requisition for picking signals the storeroom to begin the process of issuing the items on the requisition. When you release a requisition, you can instruct the system to automatically create a pick list for the requisition. You can view and print the pick list as well.
The role objects that control access to the required functions as mentioned above are "DeptReq" set to View, and "Distribution" set to Create.
A dialog box (Figure 1) asks if you are sure that you want to release the requisition.
There are two check boxes, Create Pick List and Print Pick Document. The default for both is Yes.
When you create a pick list when you release a requisition, you may receive messages from the system.
One type of message informs you that the item(s) on the approved requisition are backordered, and a pick list cannot be created at the moment.
"No Pick List was created. Requisition number has no allocated quantities and was completely backordered."
A second type of message occurs when you are releasing items for picking in a different organization and asset location than the organization and asset location specified in your Current Settings. The message is:
"No pick list was created. Requisition number has allocated quantities present, but no pick list was created because the allocated lines are supplied by an asset location different from the Current Settings. Pick list needs to be created manually."
This message is common in multi-organizational environments. It means that the items have been allocated, but you need to create the pick list manually. The process is straightforward -- see Building Pick Lists Manually and Picking Requisitions for instructions.
You can view the pick lists that the system creates for requisitions. You can also re-create pick lists for a requisition; reprint them; and view the number of times, and by whom, each pick list was printed or re-created.
From the Materials Management main Contents, click Warehousing > Pick List. Current pick lists appear.
Locate
the pick list that you wish to view. You can search on the Pick No
column or the Pick Date column.
Tip: Next to any Pick No, clicking Menu > View Reqs in Pick
shows all the requisitions in the pick list.
Beside each requisition, click Menu > Requisition Lines in Pick
to see the items to be picked.
Figure 2 shows some pick lists.
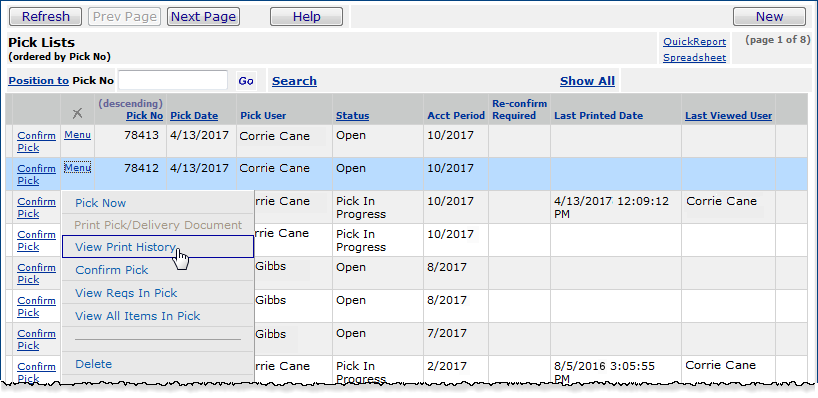
Several columns for each pick list entry are particularly worth attention. They are: Pick User, Last Printed Date, and Last Viewed User. (Click Help for information on other fields in the Pick List Panel.)
If a pick list was created during requisition import through a gateway, the value in the Pick User column is GatewayUser. If the Last Viewed User is also GatewayUser, then the pick list has not been viewed or printed by anyone. You can only be sure that the pick list has been opened and viewed when an actual user ID for someone at your site appears in the Last Viewed User column.
You can get details on whether a pick list was created once or several times, and who viewed the pick list.
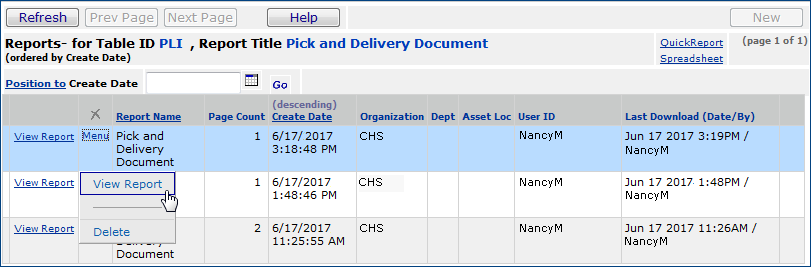
In Figure 3, the Create Date is a date when the pick list was created or re-created. The pick list shown has been created once, and re-created twice. User ID is the ID of the person who created the pick list. The menu item View Report displays the pick list. After the pick list is displayed, the column Last Download (Data/By) is updated to show user who viewed the pick list and the date.
To view the status of your department's requisitions, from the main Contents select Requisitioning > Current Dept.
Copyright © 2023 by Premier Inc. All rights reserved.