Using the Reports Menu Version
Contents
Overview
Whether you use Supply Chain, Financials, or Sourcing and Contract Management, a robust set of reporting
capabilities is available. The system contains predefined reports,
as well as a custom report writer for creating your own report definitions.
The system maintains completed reports in a
common location (My Archived Reports)
so that you can view or print them when needed.
The reporting feature is available from the Reports menu.
- From the Materials, General Ledger, or Accounts Payable main Contents, select
Reports.
Note: Financials - General Ledger also
contains a Financial Reports capability from which you can create financial
reports in various formats.
Before you start, it is important to know this:
Reports that you output in .pdf are OCR enabled. This means that you can use the .pdf search
to locate information in a long report. This feature is extremely handy when you have a very large report,
and wish to locate a single piece of data.
Access to Reports
Your ability to create, run, and view reports depends on whether a Report Profile
is assigned to your User ID; and if so, which Report Profile. A Report
Profile limits the reports that a user can access, so that not all users at
a site may be authorized for all reports. If you need access to reports, see
your site's system administrator.
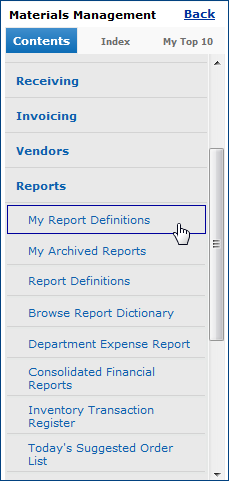
My Report Definitions
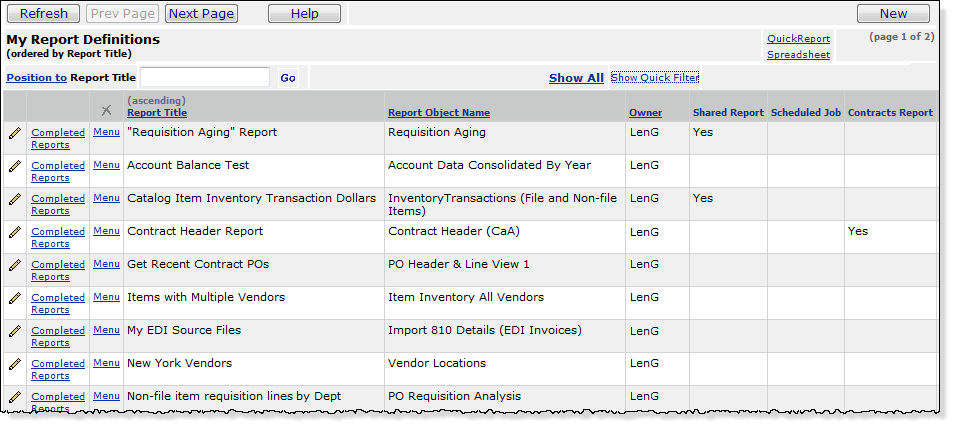
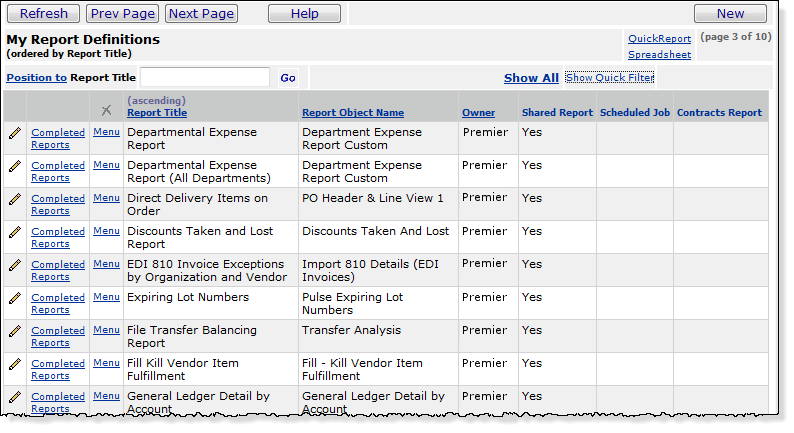
My Report Definitions (Figure 1) contains the list of custom report
definitions that you, or a person at your site have created.
(For instructions on creating custom reports, see
Creating Custom Reports.) You can run and print reports from the My Report
Definitions list.
Figure 1 - A List of Materials Management Reports in My Report Definitions
The user ID of the person who owns the report is in the Owner column.
If the report is available for others (besides the owner) to use, Yes
appears in the Shared Report column.
The Menu next to each report on the
list contains various actions:
- Print Report - Runs a report based on the report definition and
makes the report available for viewing or sending to a printer.
- If the report has parameters that you must specify when you run it (e.g.,
fiscal year), the Report Selection Values panel opens. (Otherwise, this panel
does not appear.) Use the panel to select a value.
- Click Submit. The system sends a message that the report has printed.
You can view the report from Completed Reports or from My Archived
Reports.
- Job Scheduler - Opens the Job Scheduler so that you can set up the
report to run on a schedule; for example, "Every Friday at 12:00 PM."
See Set Up Schedules for Batch Jobs.
- Completed Reports - Displays a list of iterative runs of a report.
- Selection Builder - Lets you refine selectable fields for the report.
- The Selection Builder lets you refine your selectable fields to capture
more specific data in a report. For example, if Vendor No is a selectable
field for a report, using the Selection Builder, you could specify "Vendor
No EQ Primary Vendor". The report would then generate data for every
vendor that is a primary vendor. Click Help on the Selection Builder panel for details.
- Print Preview - Displays the layout for the report.
- Edit - Opens the editor.
- Copy - Copies the report definition.
- Delete - Deletes the report definition.
My Archived Reports
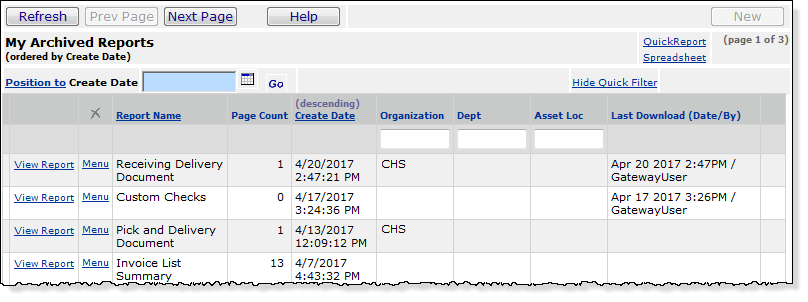
My Archived Reports (Figure 2) contains the list of reports that have run since
the last time the list was purged. The Menu next
to each report lets you view (and print) or delete the report.
Figure 2 - My Archived Reports
To
view and print reports in My Archived Reports:
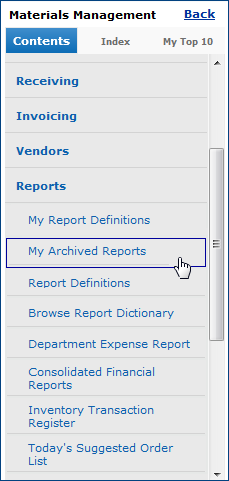
- From the main Contents, select Reports > My Archived Reports.
The system displays a list of the reports that you have run. (See Figure
2.)
If a report is still running,
the message "Print standard report running" appears on the list in front
of the report.
- Wait a few minutes to let the report finish running, then click Refresh.
The message disappears,
and you can open your report.
-
Click View Report (or select Menu > View Report) to see your report.
Adobe Acrobat Reader opens,
showing your report.
-
Click the printer
icon on the Adobe Acrobat Reader toolbar (or select File > Print)
to print your report.
The Print Dialog box appears.
-
Select the printer
and other options and click Print.
Your report prints on your
system printer.
-
To close Adobe
Acrobat Reader, click the X in the upper right-hand corner.
To delete a report from My Archived
Reports:
- From the main Contents, select Reports > My Archived Reports.
The system displays a list
of the reports that you have run. (See Figure 2.)
- Locate the report that you wish to delete. Select Menu > Delete.
The system asks you to verify
that you wish to delete the report.
- Click Delete.
The report disappears from
the list.
Report Definitions
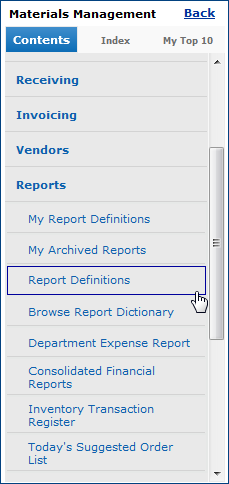
Report Definitions (Figure 3) contains report definitions in the system. You can edit or change these report definitions as though they
were defined at your site. The Menu for each report definition is the same as
the Menu for My Report Definitions.
Figure 3 - Report Definitions
Browse Report Dictionary
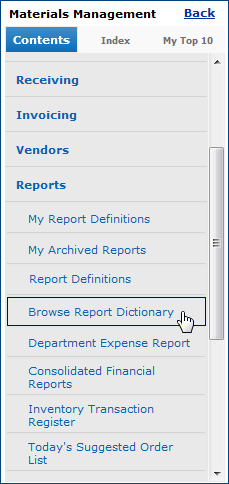
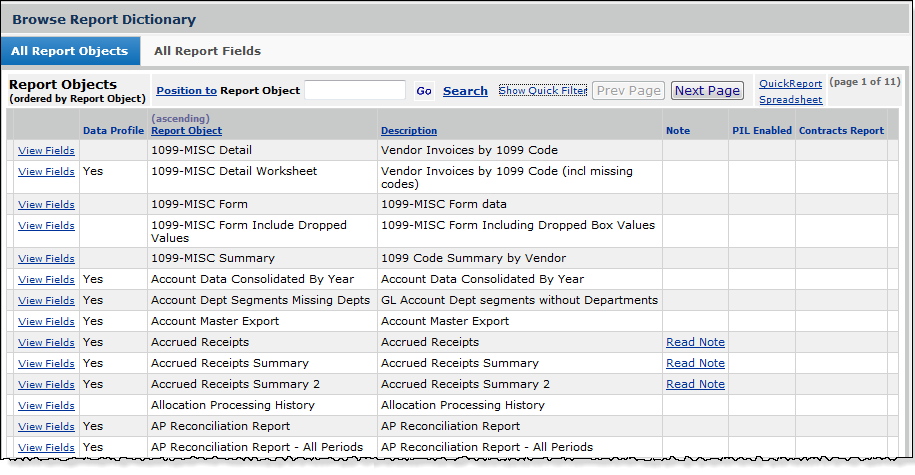
The Report Dictionary (Figure 4) contains all the Report Objects
and Report Fields that you can use in creating or editing report definitions.
The lists are in alphabetical order and are sortable.
Figure 4 - Browse Report Dictionary Panel
- To view a report object's fields (from the Report Objects tab), click View
Fields.
- To view the report objects that contain a field (from the Report Fields
tab), click View Objects.
Quick
View of Popular Reports
Following Browse Report Dictionary
in the Reports main menu is a list of several popular reports. The list
is different for Materials Management, Accounts Payable, and General Ledger.
- To run a report listed on the Reports main menu, click the report
title.
For example, in Figure 4, clicking Today's Suggested
Order List would run the Suggested Order List. The output is routed to
My Archived Reports.
Purging
Obsolete Archived Reports
The system
provides the ability to purge
old reports from the Archived Reports list. The administrator at your site may wish to run a weekly purge of the Archived Reports
list so that it doesn't become unwieldy. If you need access to reports
on the list for an indefinite period of time, you may wish to speak to your
administrator.
Setting
the Reporting Year and Period
The year
and period for running reports is set on the Organization Edit panel.
- From
the main Contents, select Tables > Organization.
- On
the Organizations list, locate the organization and click the edit icon
 .
.
The Organization panel appears.
- In
the right-hand column, locate the fields Reporting Year and Reporting
Period. Enter the year and period for which you wish reports.
- Click
Submit. The system Returns you to the Organizations list.
Note: You must have the proper authorizations
set in your user profile to edit the organization record.
Copyright © 2023 by Premier Inc. All rights reserved.
