Contents of this topic: |
Links to related topics: |
| Search Contracts Online Doc | Current Release Notes |
Features are built into Sourcing and Contract Management to ensure the privacy of electronic protected health information (ePHI), in compliance with HIPAA requirements. Among the features designed to protect ePHI data is a setting on the user profile that restricts unauthorized users from viewing patient information in panels, spreadsheets, reports, printed documents, and other application elements.
Important: You should be aware, however, that if you enter free-form ePHI data in notes attached to contracts, purchase orders, requisitions, order guides, item records, invoices, and any other application documents, the ePHI data cannot be protected from display (or editing) by unauthorized users. Your site may wish to establish a policy for notes so that you are not inadvertently making ePHI information visible.
Review the chapter "Securing Electronic Protected Health Information (ePHI)." This recommendation is particularly important if your site uses
's Materials Management. Also, read the chapter on setting passwords.
The system displays a panel for entering user notes. (Figure 2).
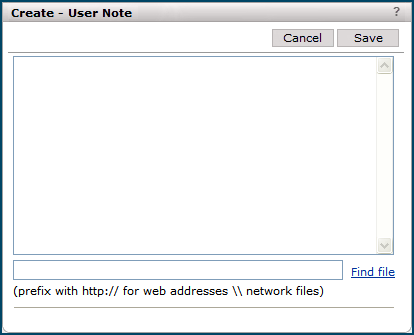
If you wish to link a document to the user notes, do the following.
In the box at the bottom of the entry panel (Figure 2), enter the location and
name of the document file.
The location can be a URL (that is, a web address beginning with http://)
or a path to a file in your network (beginning with \\).
You cannot create a link to a file on your computer's local disk drive. Local drives begin with C:, D: or sometimes E: -- these locations are not valid for the link. The path to the linked file must be a network location.
Enter the file location, or click Find file to
search for the file and select it.
- You can link to files with extensions .htm, .pdf, .xls, .doc (and other Microsoft Office formats), .jpg, .gif, .wav files, and others.
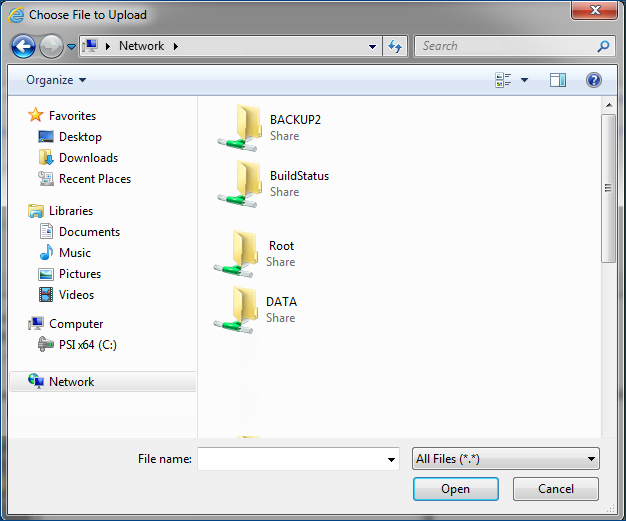
Find file opens the Windows Explorer browser. (Figure
3).
Important: The file that you identify must be on a shared network drive. If you try to create a link to a file on your own PC, other users will not be able to access the file.
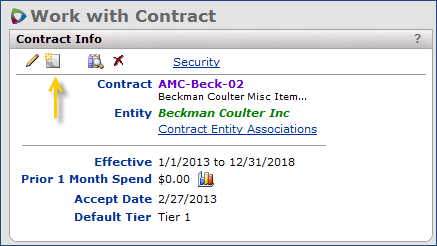
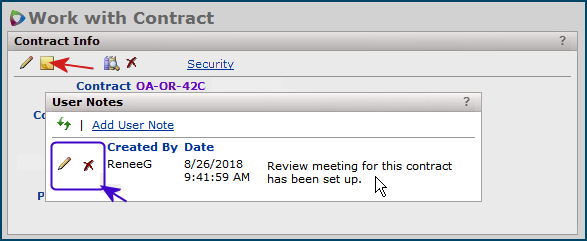
To view user notes, click the user notes icon ![]() on a panel (Figure 4, red arrow).
The User Notes panel appears.
on a panel (Figure 4, red arrow).
The User Notes panel appears.
Once the user note is open, you can edit it or delete it (Figure 4).
You can also add another user note.
Copyright © 2023 by Premier Inc. All rights reserved.